EB5AGV's '92 Yamaha FJ1200 Page
One bike for my riding life

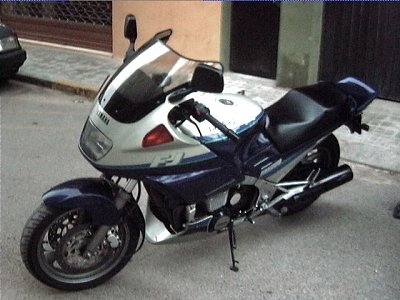
This page deals with my '92 Yamaha FJ1200. A very nice bike that I bought on March 2000 and is my pride and joy.
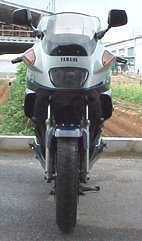
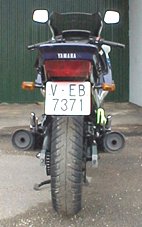
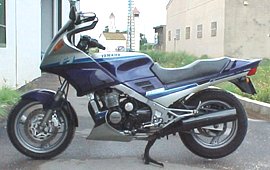
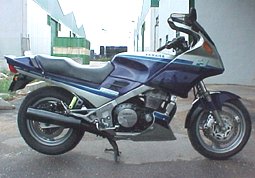
March 2000 - Love at first sight
This is the bike as I bought it. It had just 38.000km. I had never ridden a so powerful machine and got hooked at first sight and ride. It should be mine!
April 2000 - Adding some accessories
These are the Krauser K2 panniers that I will add to my bike to make it more 'touring friendly' (the pictures are from the bike which had them previously installed)

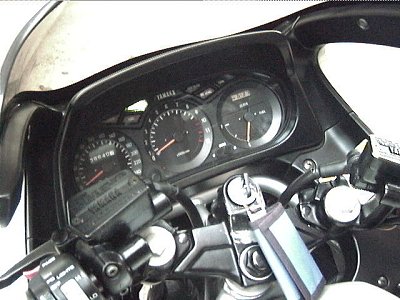
September 2004 - Some updated pictures
Here you have some current pictures of my FJ.


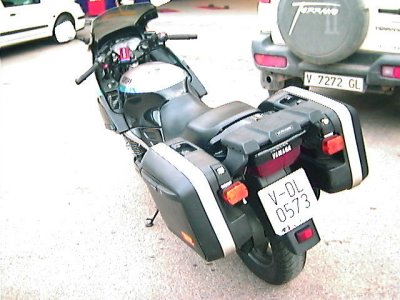
September 2004 - Ready to run!
I got the bike ready for a trip with my wife so, finally, I put the Krauser K2 panniers on it.


But I prefer to have the FJ without panniers so they were removed after the trip and are stored until next one.
October 2006 - Some news
Today the bike has turned 54.000km... after a work change, now I go to my workplace with it, so I am doing about 40km daily. I plan to do some maintenance to the FJ soon... keep tuned!
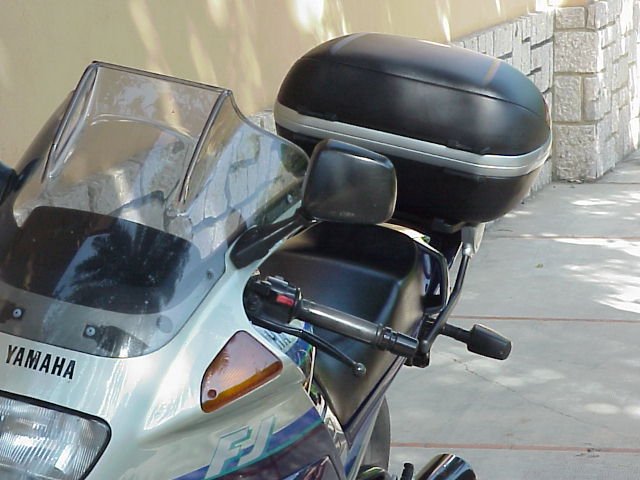
July 2008 - Adding a GIVI topcase
Even going work with the FJ, it is only 58.800km... Well, last thing I have done is to put a GIVI Topcase on it. Here you have my (slightly edited) comment on the FJ List:
Last Christmas I decided to make me a gift ;-), consisting in a GIVI F297 Topcase Mounting Kit (for Yamaha FJ1100, FJ1200 (87-96)), an M2 adapter plate and a V46 topcase
Time flies and I had not need for the topcase... but now I need to do some weekend trips and found it was the right time to mount it.
So yesterday I decided to go for it. Good thing is that you keep small rear covers on the bike (not as with the Krauser K-2 luggage kit I have which, BTW, will be for sale soon)
Procedure is easy enough; you just need to get out seat, dismantle lateral covers (just by pressure; there are 4 points for each one. Be careful not to break them, as my mechanic did :-( ), rear covers (one screw each and one sliding rubber support). Then you will find the two needed fixing points: one is used to fix the rear archwheel plastic cover and the other one is the blinker support. GIVI provides you with all the needed hardware, which is very sturdy, and reuses some of the original one. You will end with four extra screws and 2 washers, which are replaced with longer and larger ones.
Adjustment was also easy, as there are markings to adjust the adapter plate angle and there is not too much support position freedom so getting it right is not hard. GIVI provides you with plastic screw covers so you end with a very nice looking rack.
I was surprised to find all the kit is aluminum, including the adapter plate. It is all painted black except for some silver parts.
The topcase I have bought is a 46 liter unit, which should be enough for a weekend trip (let's hope ;-)!). Fixing it to the rack is very easy and, as it is tightly mounted over rubber supports, fit is perfect. Kudos to GIVI for the great work!
All in all, I will do my first "real test" tomorrow, in a 180km trip. I will let you know how my V46 behaves at highway speeds (120-130km/h, there are two many radars around to go faster!)
*** NOTE: it seems that the F-297 kit has been DISCONTINUED. I think it is a good moment to buy it, if you are thinking to get one ***
And here you have some pictures (sorry for the lousy quality; I will take better ones with more light!)


Here you have some other pictures taken next day (5 July 2008), just before a weekend trip:


August 2009 - Oil change
Ready to begin the work: the FJ, the oil, the filter, some tools... and some other which are not seen

Detail of the work area

Lower cover off. Oil pan ready to pick old oil

Once I got the oil drain plug out, a really dark oil flowed... it had 7.000km on it (yes, I know, far too much!)

After about 30 minutes, I opened the oil cover drain. I got some cm3 of oil from it


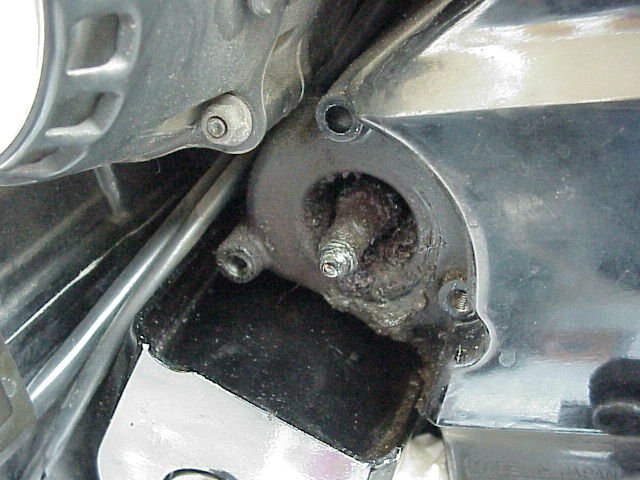
Once I got the oil filter cover, this is what you can see below. Beware of the oil still coming out of the area; put something to absorb it or it will go directly to the exhaust and will burn later...

These are the parts you will find inside the oil filter cover (apart of the filter itself!)

This is the oil filter cover, looking from the inner side

I put a new filter, using new gaskets.
Then I filled up with Castrol GP 4t mineral oil... it was already dark. So I put back the lower cover and took a picture, this time with flash (sorry for lousy quality). I started the engine, run it for 1 minute, let it for some minutes and rechecked level, filling up the MAX level

This is the final look of the area (again, sorry for the picture quality)

Now I need to run the FJ... I have a 350km trip this coming week :-)!
April 2010 - Clutch repair
Leaving any vehicle unused for a long time is never a good thing... In my case, I found that the clutch had stopped working. It was time for some work!
The reservoir told a sad tale...

And, yes, it was confirmed when the slave cylinder was opened


I had got a new slave cylinder kit and, after carefully cleaning the circuit and the cyclinder, I installed it

After that came a loooong process of bleeding the circuit. I thought it was never going to work!. But, eventually, it did.
October 2011 - Carb problems begin
After, again, a long time without using it, I tried to start the FJ and it took a lot and did not work as it should. I thought there was a problem on the fuel pump, so I dismantled the contacts to check them, but they were perfectly fine.


After some more tests, I found that some carb jets should be clogged, as the engine worked on 3-cylinder at low revs and did not perform as it used to do.
May 2013 - The sad truth
My brother organized a nice 450km trip. I did my best to have the FJ ready and, yes, I could ride it. But it was not even a shadow of what it once was!. The bike barely managed to keep the idle and, when starting to accelerate, it hesitated a lot. It was only barely OK when cruising. But that bad experience triggered my need to fix the bike. So I ordered a set of new carbs from RPM. I was fortunate to get them at a very good price, as it trippled just some months later!


But then it came the next problem... to find the time (and the guts) to do the work. Yes, I know that for some of you it is just an easy task. But I was not so confident of my abilities. That, added to the large workload, precluded any work for almost two years...
March 2015 - The decission
I needed to decide if I wanted to keep the FJ or not. If the answer was positive, I needed to fix it. Period. So I decided to take it to a pro to fix it. But then, in order to get it there, I had to get it out of my house... and it was not an easy task, as my garden is lower than the street and the way to get it out was not an easy one without the engine help. I was trapped on my own house. Great!
But thanks to the encouragement of the FJ & FJR Club UK forum people, I decided to give it a try.
This is the bike on its center stand, waiting for the great moment

Tank out!

These carbs have been undisturbed since 1992!

Plenty of dirt below the tank...

After lots of time, carbs are finally on its way out. To manage that, I have done two important things: loosen the battery tray, removing both lateral bolts, and remove the two large sub-chassis bolts just close to the carbs, so the sub-chassis can move barely some mm, but crucial to get the carbs out.

And here you have the carb-less FJ

It is also dirty here!

I have cleaned the area. It has not been a very detailed cleaning, but I had no time to get into details. Anyway, it is lots better than it was.

And TWO HOURS LATER, finally the new carbs are on its place!


After that, I have installed the fuel tank and the bike has started in just few seconds. Brilliant!
Now I will pass MOT and take the bike to a mechanic for some works which I can't do now: replace tires, replace front disk brakes, balance carbs, change all fluids and so on. More to come!
July 2016 - Front braking fix
Following last big repair, front braking had become really dangerous. It had no power, pulsed and so on. So, finally, I decided to replace all the front braking system.
That included new dics (EBC), refurbished calipers (blue dots from a Fazer 600), new pads, new brake lines and a refurbished brake pump (from a '02 FJR1300)
Here you have some pictures:

And this is one picture taken on first road test:

Braking now is so good that the FJ1200 seems like a completely different, more modern bike. Great!!!